Eviivo PMS Integration
The Eviivo Property Management System (PMS) Integration connects Bizaldo POS directly to your Eviivo account. This allows your bar, restaurant, or retail cashiers to post food, beverage, or service charges directly to an occupied guest room bill (folio). It also automates refund/void adjustments in Eviivo when POS orders are cancelled.Availability: Eviivo integration features are configured in the Admin Portal and executed on the POS Tablet App.
How it works
POS Order Created
The cashier adds items to the cart in the Bizaldo POS terminal.Payment Method Selection
The cashier selects Charge to Room (Eviivo Room Charge) as the payment method.Guest Directory Lookup
The tablet requests active check-in guest folios from Eviivo for the selected properties.Currency Validation
The system verifies if the POS currency matches the guest booking's native currency (e.g. SAR vs. GBP) and blocks the charge on mismatch to prevent exchange rate discrepancies.Post Folio Charge
Upon successful validation, the charge is sent directly to the guest's Eviivo bill, completing the order in the POS.Automatic Void Adjustment
If the order is subsequently voided or cancelled in the POS, a negative adjustment is automatically posted to Eviivo to clear the room charge.1. Admin Portal Configuration
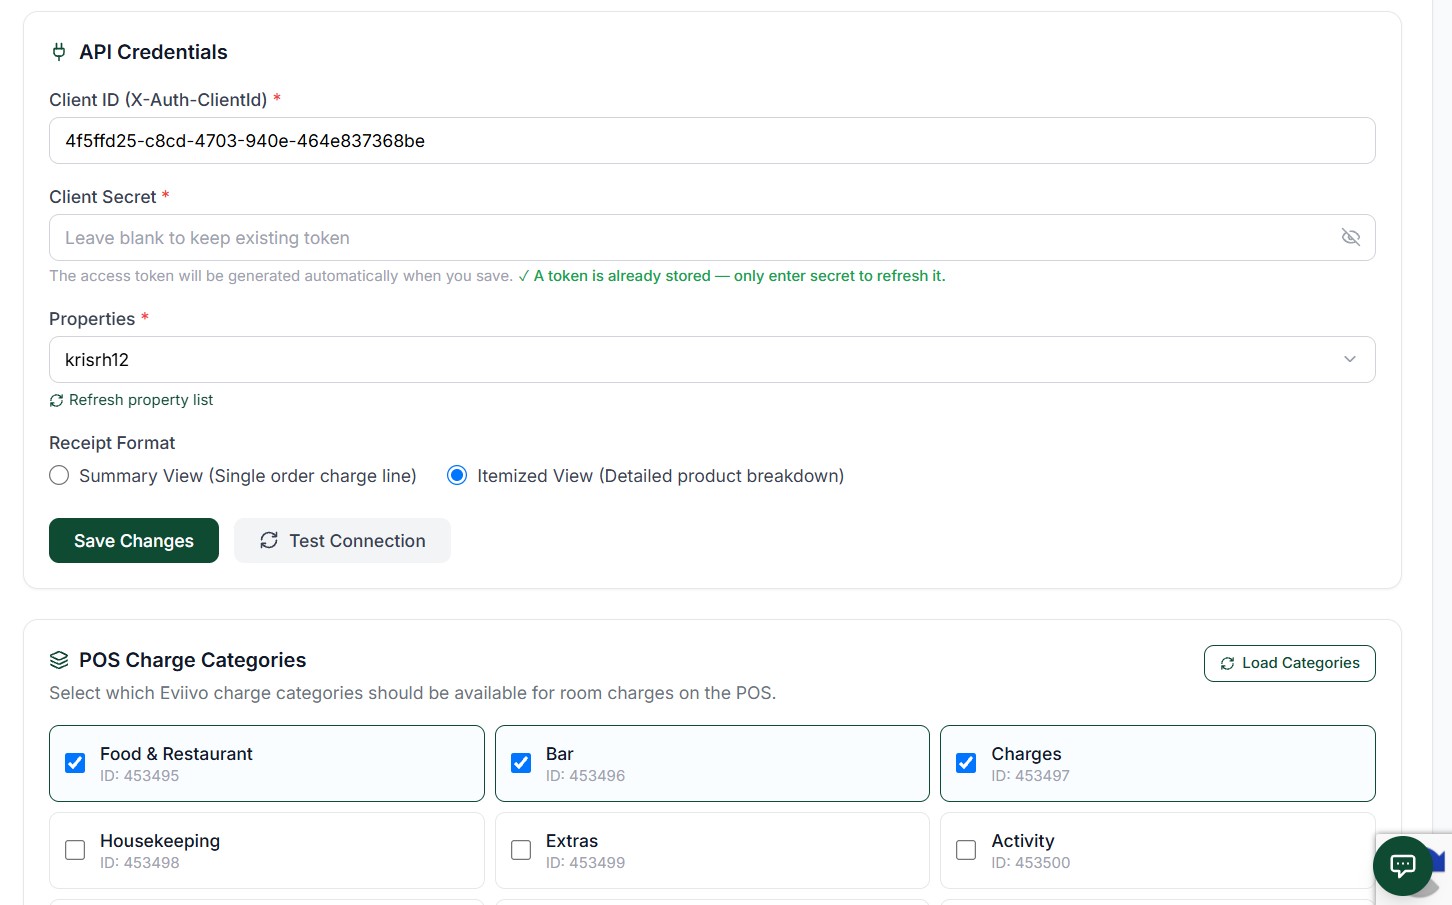
Before cashiers can charge orders to rooms, the integration must be configured for your company and property context in the Admin Portal under Settings → Integrations → Eviivo.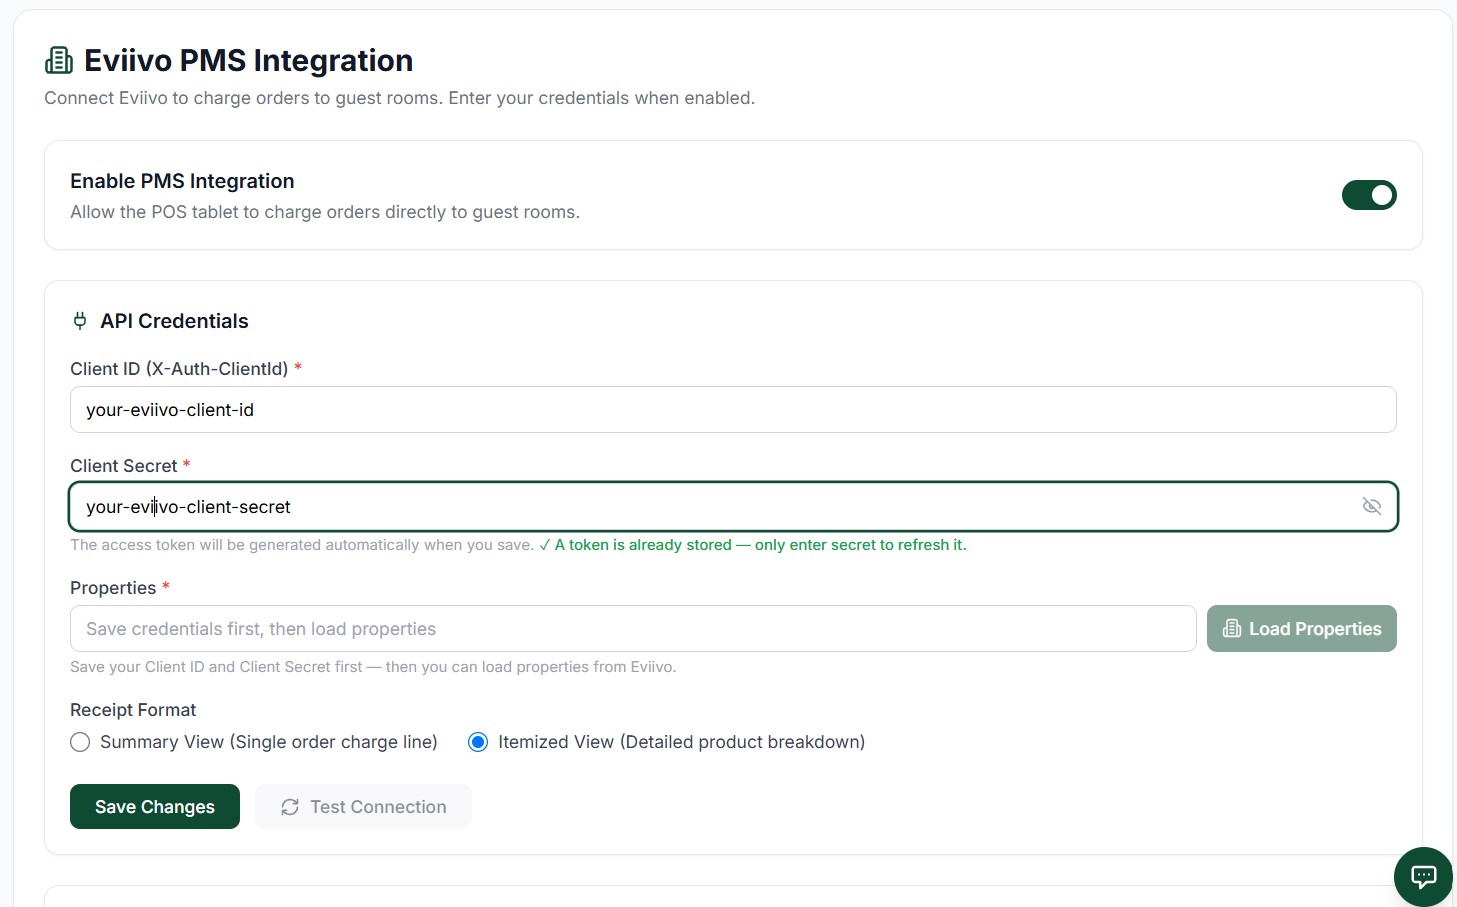 12345
12345Figure 1 — Admin Settings Panel: Eviivo Credentials & Format Configuration
Screen Elements
Turn on/off Eviivo integration. Toggling it off instantly disables Eviivo Room Charge button on the POS Tablet.
Enter your unique Eviivo Client ID obtained from the Eviivo dashboard.
Enter your Client Secret to authenticate. This write-only field clears upon a successful save.
Choose between Summary (single bulk charge description) or Itemized (individual product variants, adjustments, and taxes).
Save settings to authorize the connection and load available properties and category mappings.
Step 1: Connect Credentials
- Enter your Eviivo Client ID (Step 2).
- Enter your Eviivo Client Secret (Step 3).
-
Select your Receipt Format (Step 4).
- Summary Format: Posts the entire order as a single line item: `POS Order #MAIN001-NW9KHY3Z-1782811657554`
- Itemized Format: Posts each item in the cart as a separate line item, including:
- Stepped variants and deals (e.g., `[Burger Deal] Cheeseburger (Large, Extra Cheese) x1`).
- Dynamic delivery charges and discounts.
- Rounding adjustments to ensure the Eviivo total matches the POS total exactly.
- Click Save Changes (Step 5) to save credentials and generate your OAuth token.
[!NOTE]
The system automatically handles token renewals behind the scenes. You only need the Client Secret when setting up the connection for the first time or switching Eviivo accounts.
Step 2: Configure Properties & Categories
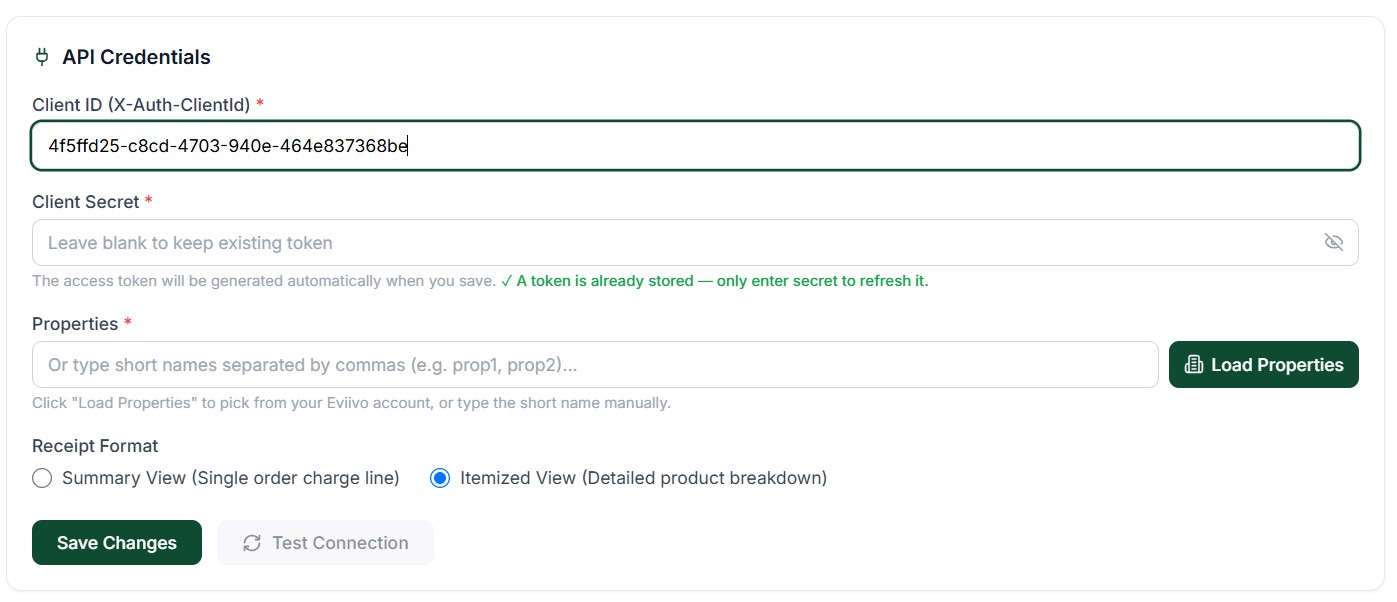
After saving your credentials, you must load and link the properties and categories:- Click Load Properties (Step 6) to fetch the active properties list associated with the validated credentials from Eviivo.
 6
6Figure 2 — Click Load Properties to fetch Eviivo properties list
Screen Elements
Fetch all active properties associated with this Eviivo account.
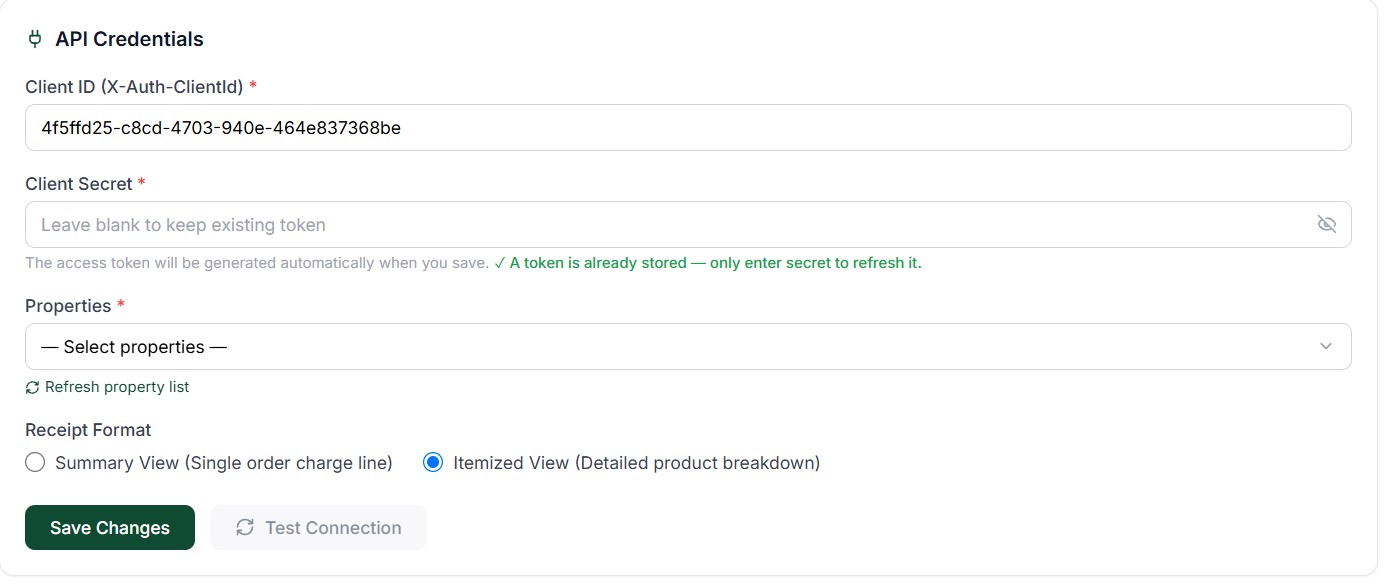
- Click the Select Properties dropdown selector field (Step 7) to view the checkbox list.
 7
7Figure 3 — Click Select Properties to open the property list
Screen Elements
Open the dropdown to view available properties for selection.
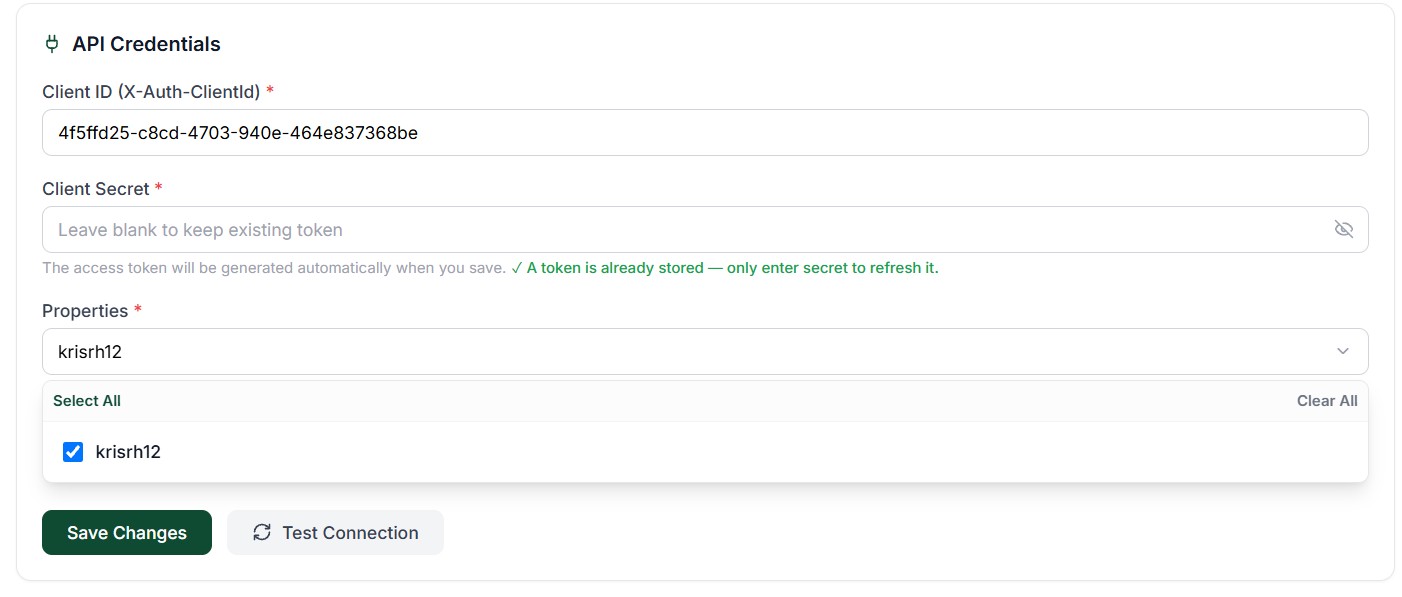
- Check the checkboxes next to the properties (Step 8) you want to enable for room charging.
 8
8Figure 4 — Check Eviivo properties and map POS charge categories
Screen Elements
Select the checkboxes for all properties to link them to the company.
- Select the POS Charge Categories (Step 9) where transaction line items will be mapped on guest bills.
 9
9Figure 5 — Check Eviivo categories for POS mappings
Screen Elements
Select the categories where POS transactions should map (e.g. Bar, Food & Restaurant).
- Click Save Changes (Step 10) to finalize your integration setup.
 10
10Figure 6 — Click Save Changes to finalize Eviivo integration settings
Screen Elements
Save all property and category mappings to complete configuration.
2. POS Tablet Operations
Once enabled, an orange Charge to Room button appears on the POS Tablet Checkout screen.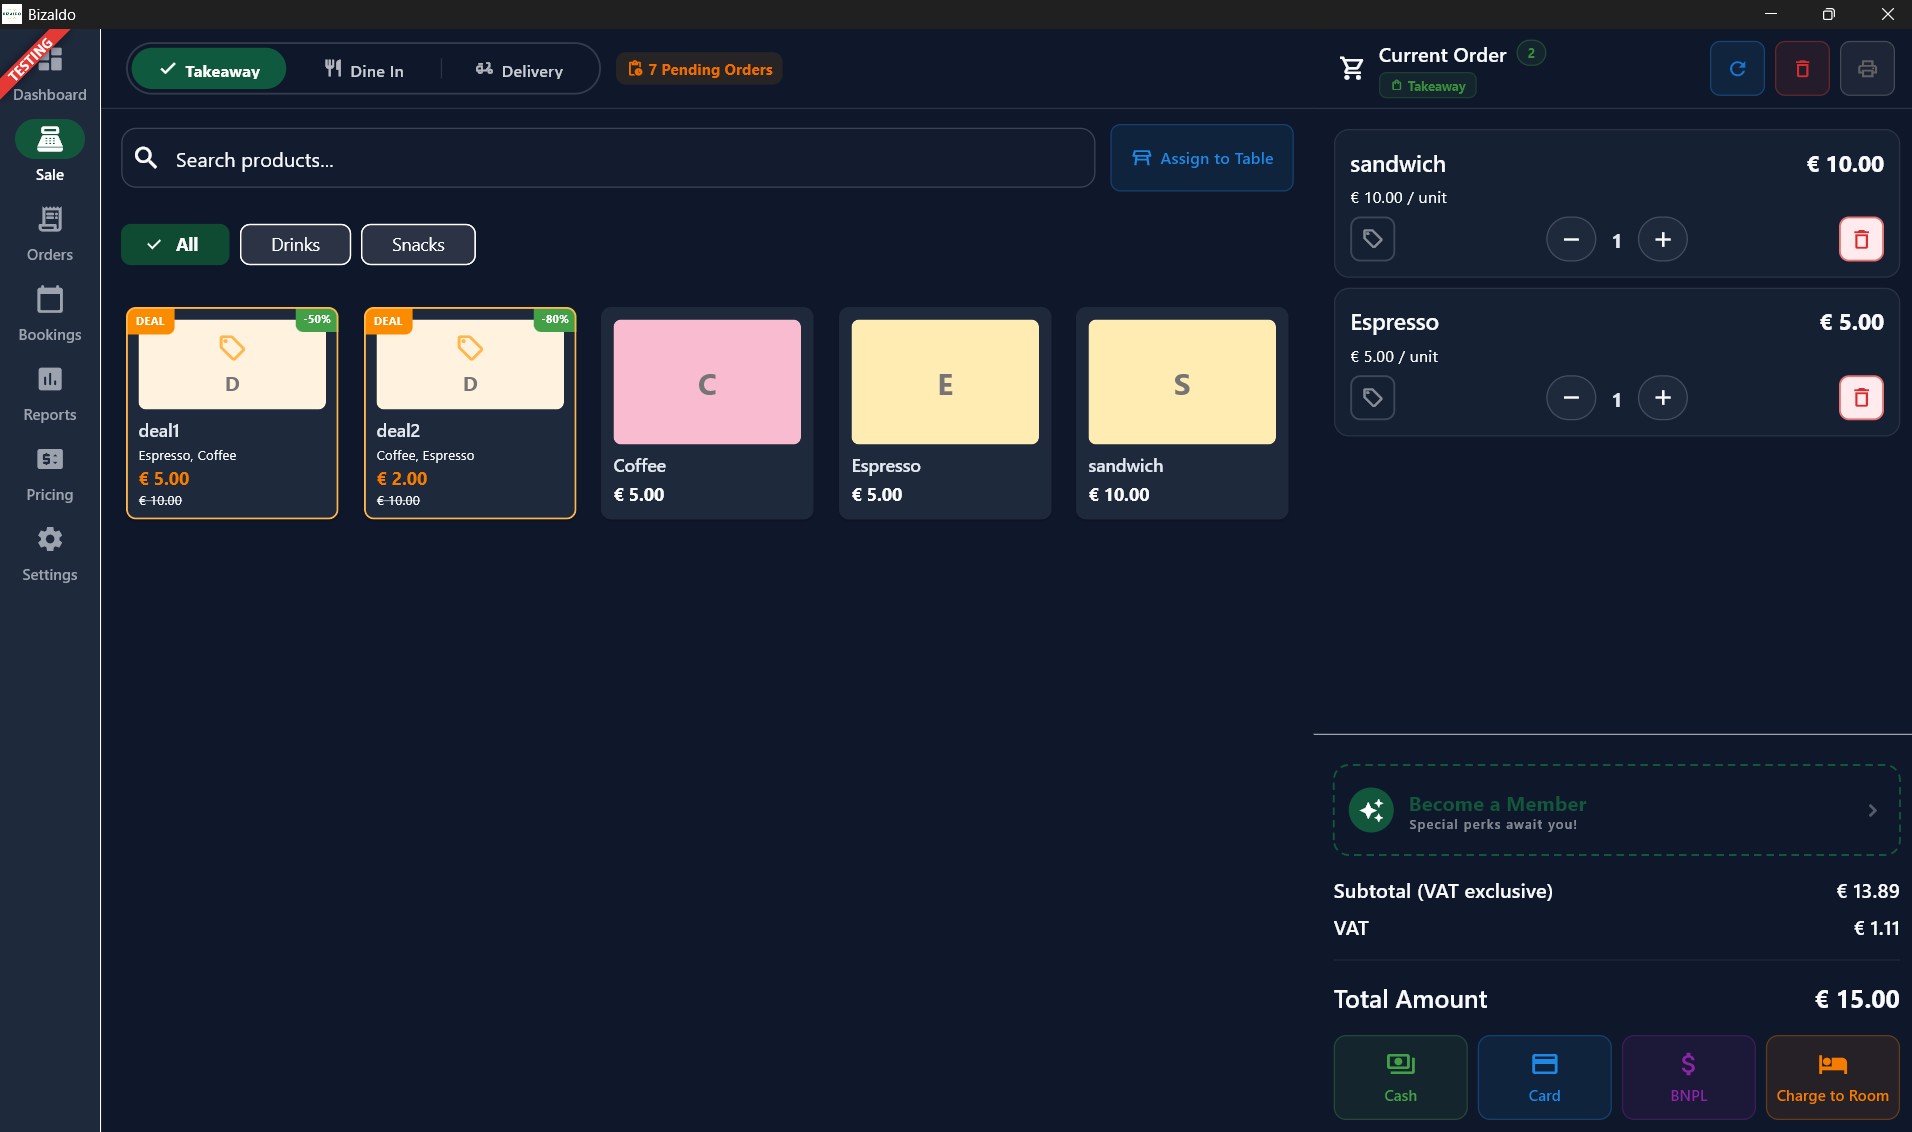
Figure 7 — POS checkout options: Charge to Room payment method button
Screen Elements
Guest Lookup & Room Selection
Clicking Charge to Room opens the occupied guest room selection dialog: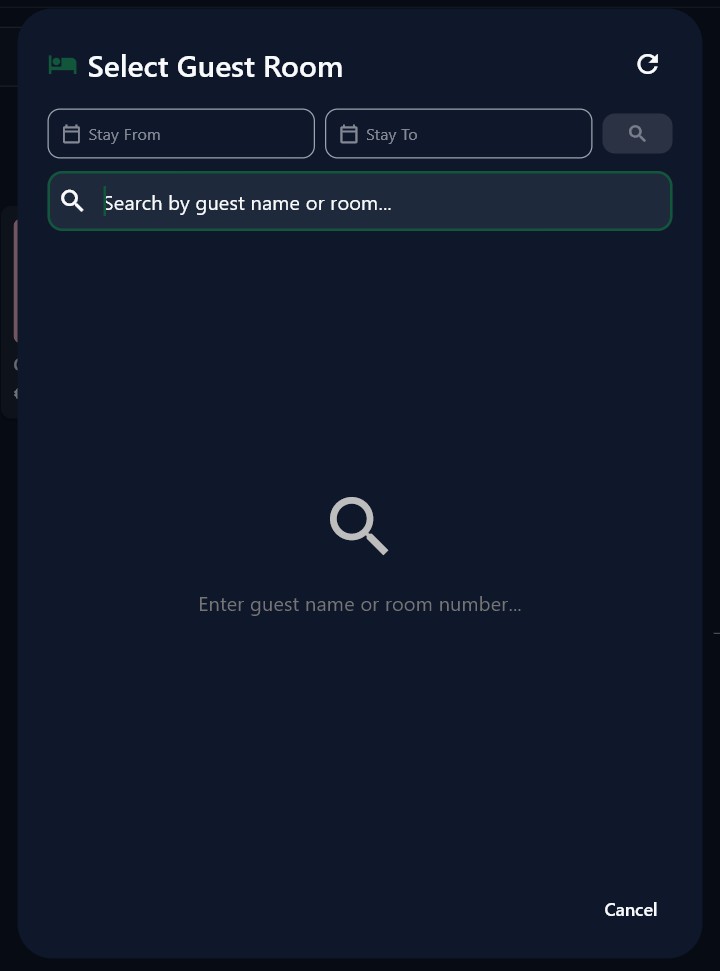
Figure 8 — Active guest list selection and search interface
Screen Elements
- Active Guest List: Shows occupied guest rooms currently checked-in at the hotel.
- Property Filter: If multiple properties are configured, a property selection dropdown allows cashiers to filter guest lists by specific properties.
- Room Search: Cashiers can search by Guest Name, Room Number (e.g. typing `"Room 8"` or `"8"`), or Eviivo Booking Reference.
-
Check-In Status Badges:
Dynamic capsules appear next to guest names to show their status:
- `Checked In` (Green): In-house guests.
- `Not Checked In` (Yellow): Future bookings.
- `Checked Out` (Red): Departed guests.
- Date Range Search (31-Day Limit): Cashiers can search for guests by selecting a date range. The search window is restricted to a maximum of 31 days in compliance with Eviivo API limitations. If a cashier selects a range longer than 31 days, a clean warning is displayed.
- Remote Booking Fallback: If a guest is not currently in-house (active list), typing their booking reference triggers a direct remote API call to Eviivo to verify the booking.
Dynamic Currency Matching Validation
To prevent billing discrepancies (e.g. charging a guest `£10.00` for a `10.00 SAR` coffee order due to exchange rate mismatches), the system validates currencies: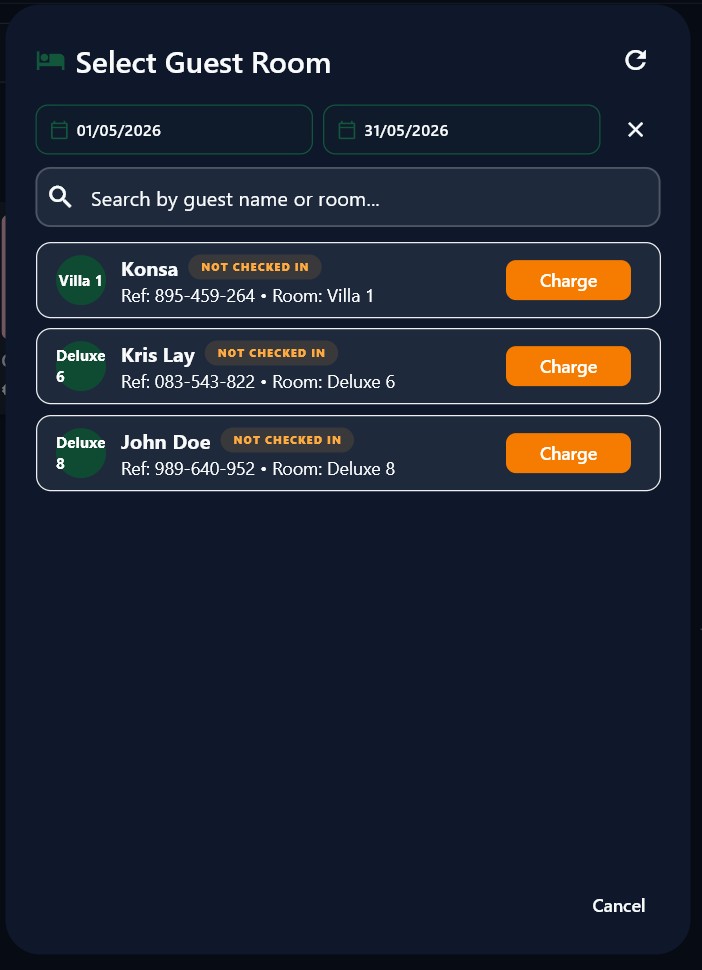
Figure 9 — Currency check validation on guest folio lookup
Screen Elements
- The app resolves the guest booking's native Eviivo currency code (first from the active guest list, and falling back to a direct booking reference API lookup if the guest is not in-house).
- The resolved currency is compared against your POS default currency (e.g., `GBP` vs `SAR`).
- If they mismatch, the transaction is blocked, and the POS displays a clear validation error: `Currency mismatch: Eviivo booking currency (GBP) does not match POS currency (SAR). Please settle this payment via Cash/Card instead.`
Cart Recovery & Order Re-use (Anti-Ghosting)
When a cashier clicks Confirm & Charge: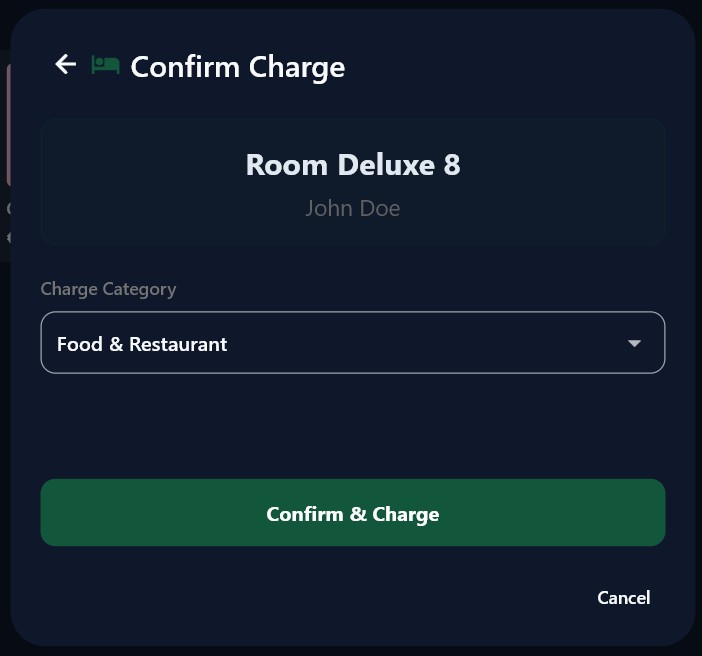
Figure 10 — Confirm order total and complete room charge posting
Screen Elements
- The POS creates a `pending` order in the database.
- If Eviivo throws an error (e.g. a currency mismatch or network failure), the tablet catches the exception, automatically restores all items back into the cart, and preserves the dialog.
- The created order's ID is saved in state (`editingOrderId`). If the cashier retries the room charge or switches to Cash/Card, the POS updates that same order record rather than creating a duplicate ghost order in your database.
3. Voids & Cancellations
If a completed room charge order is cancelled or voided in the POS:- The backend automatically posts a negative void adjustment back to Eviivo (e.g., `-10.00 GBP` representing `VOID POS Order #MAIN001...`).
- Out-of-House Voids: If the guest has checked out since the charge was posted, the backend performs a direct Eviivo booking reference lookup to retrieve the correct booking currency and completes the negative adjustment.
- No PMS Charge ID Fallback: The void flow supports cancellations even if Eviivo did not return a `pmsChargeId` during the original charge post, ensuring Eviivo deductions are never skipped.
4. Admin Order Tracking
All orders charged to Eviivo rooms are marked in the Admin Portal:- Under Orders, a teal Charge to Room badge (with a hotel icon) appears in the Order ID column.
- Hovering over the badge or viewing the order details displays the Eviivo Room Number, Guest Name, and Booking Reference.
- The badge and labels are localized in English, Spanish, French, Portuguese, and Arabic.